Most routers and networking devices have a built-in firewall to prevent malware and hackers from accessing your important files and entering the network. Since this firewall is programmed to prevent most programs and applications, you will need to manually configure the router settings so you can use the program of your choice. Port Forwarding can help you do that. If you have been looking for information on how to enable Linksys smart wifi port forwarding feature easily, this blog will walk you through the information you need to know.
But first, what is Port Forwarding?
Port Forwarding allows for certain programs and applications that run on the internet to pass through the embedded firewall of your router or gateway. You can define rules, just like applying filters on the router to let it know that a particular port is open to receiving a specific requested data.
When you begin with the process, you will be prompted to update your Linksys WiFi router. You will also be asked to create a Linksys Cloud Account. It is advised that you do not skip this part. Once the router is updated, you can edit settings seamlessly.
Prerequisites
- Make sure you have a list of the ports that you need to forward for your device.
- Note down the IP address of your device and the computer where you will forward the ports to.
Enabling Linksys Smart WiFi Port Forwarding
You can enable the port forwarding in two ways:
- As Single Port Forwarding
- As Port Range Forwarding
Single Port Forwarding
In single port forwarding, you will need to set up public services one by one on the network like FTP servers, web servers, email servers and other internet apps. Before you begin with Single Port Forwarding, make sure you have assigned static IP addresses to your computers. Once done, you can follow the steps as under:
- Access the Linksys router setup wizard using a compatible browser.
- Once you have logged in, go to the “Router Settings” section and click on the “Security” tool.
- Next, select the Apps and Gaming tab from the menu bar.
- Click on the “Single Port Forwarding” button from the top and then “Add a new Single Port Forwarding.”
- Type in the details of the device or application that you want to forward ports to. Type the App name, external port, internal port and Device IP address in their respective fields. Finally, select the protocol that applies. Also, don’t forget to tick mark the Enabled checkbox.
- Once you have typed these details, click on the “Save” button.
- Click on the “Apply” button and then “Ok” to close the window.
Port Range Forwarding
The port range forwarding feature allows you to set up public services in a group, like a range of ports from 20-25. Some applications may require opening specific ports so they can function well. These may include servers, online games, etc. So, whenever a request for a certain port arrives, the router will route the data to the computer you would have specified. Here are some steps you can follow to enable port range forwarding:
- Open the Linksys router setup wizard online.
- From the router settings section, click on the Security Tool button.
- Click on the Apps and Gaming from the menu.
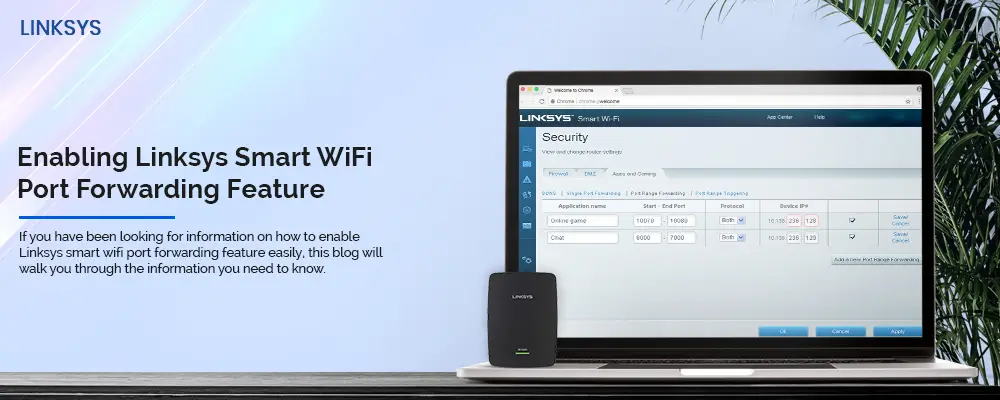
- From the next page that appears, click on “Port Range Forwarding” and then “Add a new Port Range Forwarding” button.
- Type in the required details like the application name, Start and End port, Device IP address, and tick mark the Enabled checkbox.
- Once you have entered the details, click on the “Save” button and then “Apply”. Click on “Ok” to close the window.
The Linksys Smart WiFi Port Forwarding is now enabled and you can begin accessing the internet seamlessly.
If you would need any help with the same, you can always reach out to the team at our end for help.